⚙️ Elevate your oil control game with smart precision and zero hassle!
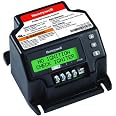
The Honeywell R7284U-1004 is a universal electronic oil primary control featuring a 16-character, two-line tri-lingual LCD for easy programming and diagnostics. It offers programmable parameters without the need for extra tools, and status/fault alerts via LED or display. Compact and lightweight, this reliable Honeywell model is designed for seamless integration and efficient oil burner management.
| Brand | Honeywell |
| Style | electronic |
| Power Source | Corded Electric |
| Color | Color |
| Item Weight | 1.4 Pounds |
| Global Trade Identification Number | 00085267344708 |
| Number of Items | 1 |
| Manufacturer | Honeywell |
| UPC | 085267344708 094714274482 |
| Brand Name | Honeywell |
| Model Info | R7284U-1004 |
| Item Weight | 1.4 pounds |
| Product Dimensions | 7 x 5 x 4.5 inches |
| Item model number | R7284U-1004 |
| Is Discontinued By Manufacturer | No |
| Part Number | R7284U1004 |
| Included Components | Honeywell R7284U-1004 Universal Electronic Oil Primary with Programmable Parameters and LCD Display |
| Batteries Included? | No |
| Batteries Required? | No |
| National Stock Number | 4540-01-575-2421 |
D**D
Thank you, Joe! I also replaced a failing R8184G 4009 with this unit
Relays started sticking on my 38+ year old R8184G 4009 on a Carlin 100 CRD. Cleaned once but faulted again after 3 days, cleaned again and needed a reliable fix. I have Franken Controls based on a 70 yr old install of a Burnam Coal/ Oil, Steam or HW boiler with 2 added zones w/ a Taco 503 in 2000. Had a problem 2 yrs ago and 2 boiler techs were stumped. Fortunately fixed w/ a $25 transformer patched in but I had to figure it out. So, I was worried that I would have to get a direct replacement of the R8184G 4009 for $70 more than this R7284 unit and 2 weeks from Amazon. This unit wasn’t supposed to arrive until next week. Just in case, I did find a R8184G 4009 at the “Big Orange” but it was $180 so was hoping this would come in time for the weekend and work out. It came in 2 days!I read Joe’s instructions and mostly followed them. I was nervous about tying both the red and black terminals to the 120 hot so first tried it w/o the red connected. No-Go.Connected the red and all was well. I did connect the igniter (blue) and Motor (orange) separately vs ganged together as my R8184G 4009 had done. Also ran separate neutrals vs ganging them all w/ a wire nut as was done on mine before. Setup was easy thanks to Joe and having the CAD cell display and diagnostics makes it look like it’s at least from the late 20th century vs. beginning of it. It was also an inexpensive fix at the end, the R8184G 4009 can go back to HD. I did have constant 120V to the jct box so did not have to run a line as others have.Thank you Joe and others for the great info. Now I can travel this weekend in peace not worrying about a cold house.
R**R
GREAT CONTROLLER, GREAT VALUE FOR THE COST!
I have a 140MBTU Burnham Boiler that the failed during a snow storm of course. No parts where available, so I ordered from Amazon. The parts arrived within 5 days due to weather. I have a Honeywell 3 wire primary oil burner controller, and found the directions quite lacking having installed many oil burners throughout my years as a general contractor. I read the reviews, and I appreciated some of the very detailed comments, which did shed light on the installation instructions (or lack thereof). I have included some diagrams and photos of my boiler to assist those of you who may not understand what others have described, as this really is not that difficult to do. I have also listed some other things to consider while you are reading this getting ready to order.You should have a 3/8 combination wrench (Oil bleeder). 7/16 combo wrench (Oil pump supply tube), 5/8" combo wrench (Nozzle & Oil Filter Housing), Pliers (Slip joint or waterpump), Needle Nose to pull wires, A flat heat and Philips screwdriver, A small cleaning brush, wire strippers, crimpers, electrical tape, AC Volt Meter or DMM, some foil pans & rags, cleaner degreaser, a flashlight, and a few braincells that still function would be helpful.Along with the tools, there are parts you really should consider. Doing a full servicing while you are down, if you haven't already is not only smart, it's a lot easier since you are taking the motor apart already.1 Order a new igniter, as this will only help if you are already having issues, its 2 wires and 4 screws, that's it, theBeckett unit was $59 on Amazon with 3 day delivery and it included a CAD cell complete with the gaskets2 Make sure you replace the COMPLETE cad cell and wiring harness, as it is cheap insurance if your not planningon doing the igniter, or if it is new. Make sure you clean the igniter springs thoroughly3 Replace your oil nozzle, the Delvans have it stamped right on the nozzle (80A 1.25) etc, or look on the boiler4 Replace your oil filter, the gaskets on it, and clean or replace the oil pump screen & gasket5 Order 25 pack of Blue T&B butt connectors to use the factory supplied color coded jumpers with insulatedconnectors already on them supplied with the new controller6 Order 25' of 14ga Stranded Red and Black primary wire, you will use this for the installation7 Pick up some degreaser/ cleaner, a small brush to clean with, and some Odor control spray for the fuel oil8 Pick up some small foil pans at the grocery store to catch oil under the parts you are servicing.9 WHILE YOUR AT IT, BUY A BOTTLE OF ALCHOHOL, IT ALWAYS HELPS.10 Read the programming notes on the diagram, these are for a Boiler, not a furnace, if you have a furnace set theType: FURN, and you can change the Ignition time to up to 45 seconds. A BOILER SHOULD BE MAX 15LAST BUT NOT LEAST: MAKE SURE YOU TURN OFF THE ELECTRIC AT THE PANEL! Turn the thermostat to "Off". When you do the initial power up, you can go into programming without the thermostat calling for heat. turn off the service switch at the boiler for safety, then shut off the oil line at the tank to prevent leaks while servicing.
J**E
Replaced R8184G 4009 Perfectly! (after a little trial and error)
I replaced a failed R8184G 4009 with this unit, and this works perfectly.I replaced the R8184G on my Beckett oil furnace with this for several reasons:1. R8184G failed.2. R8184G wasn't available locally within 3 days in the dead of winter. Even my local heater technician didn't have one on hand. If he *WOULD HAVE* had it, he would have charged me over $500 to install this unit!! (It took about 10 minutes to install and 30 minutes of trial and error to get the menu settings correctly configured)3. This was actually CHEAPER!4. I could get this delivered in about 14 hours, ordering it at 6:30PM on Monday night. It arrived by 8AM the next morning. With free Prime shipping.Since the R8184G is a 3-wire unit, this took a little figuring out to hook it up correctly, then some more figuring to set the menu up correctly.Wiring:Black AND red wire on R7284 connected to where the black wire used to go on my R8184.White wire on R7284 went where white wire used to go on R8184.Orange wire on R7284 went where red wire used to go on R8184.Yellow CAD wires on R7284 went to same yellow wires that were connected to the front of the R8184.My thermostat wires from the front of the R8184 went to the front TT terminals on the R7284.Menu settings:I originally tried to use some of the new fancy settings on the R7284. If upgrading from the R8184, don't try to use those settings. You would have to change the wiring for it to work. It caused me several hard lockouts to learn this lesson.Final working menu settings:Valve On Delay: 0 secondsIgnition time: 45 seconds matches the R8184G. THIS one you can change if you prefer.Burner Off Delay: 0 secondsTT Configured: NoSpark In On Dly: NoSpark During Run: NoAllowed Resets: Your choiceAppliance Type: FURN (for my oil furnace)Show Diagnostics: Your choiceInstaller Setup: QuitRe-Baseline: YesIt's working perfectly for me and I have blessed heat again. The replacement was very easy once I figured all the connections and settings out.
Trustpilot
1 day ago
1 month ago